Monday, April 27, 2009

Me First - Turning 9 - A Movie Experience

First let me address that "Me First" in the post title... The other day a grateful friend asked about how I made my sons' birthday "cake" - so I took her the directions. She then warned me that she would be posting photos on her blog and if I wanted to be "first" then I'd better get my act together and get the event posted. Mature of me, no?

And now we'd like to bring you another delayed report - this time from mid January of this year.

Jacob turned 9. (Try to ignore the fact that at this posting he's now 9 and nearly 1/3...) The goal is always to have Christmas decor put away by the time his birthday rolls around on the 19th, and we did fairly well with that - at least having all the trees and decorations down, boxes and bins packed and some if not most of them out in the storage building again.

Since we were still wallowing in Christmas, we didn't really take a lot of time to plan a birthday "theme" for his family only get-together. But we happened to be wandering through Costco a few days before his birthday and this little book caught both of our eyes (on both of us. I'll let you process that for a moment...)

Giving it a quick thumb through I decided for $10 it was worth it. It's stuffed with great ideas! The tip of spooning all of your cake batter into one large ziploc, cutting off a small bit of the corner and squeezing the batter into those mini cupcake pans rather than trying to fill them "2/3 full" with a spoon and slobbery index finger was worth the MSRP. The entire book is that way - telling you, with detailed and luscious step-by-step photography, how to create an array of impressive mini cakes with simple tools you already have (remember those ziplocs?) ingredients like canned frosting, spiffed up cake mixes, packaged cookies and candies you can usually find at a gas station convenience store. Yes, well worth the purchase.


Anyway - after pouring over the book for an hour on the drive home, Jacob settled on the "Popcorn" cupcakes (made with mini yellow and white marshmallows, canned frosting and popcorn containers both borrowed from a friend - which is probably how this "me first" thing started - and purchased at the Target Dollar Spot long ago) and a "Movie Night" theme was born.

He picked a movie to be shown (Chronicles of Narnia - Prince Caspian,) we made a favorite dinner, (veggie cheeseburgers with the works and tater tots,) whipped up some Popcorn cupcakes, (with about 200 pieces of "popcorn" made from mini marshmallows) and assembled a collection of movie candies of both the "regular" and "sugar free" variety for all his guests.

It was a very casual evening - opening gifts around the dinning room table with his four grandparents, mom and dad and brother and sister.

Aside from the usual "Webkinz" (that he seems to receive at any time he receives a gift) and some new family games for game night, his most favorite gift was this little magnetic letter "thing" that I picked up for a buck and a quarter at Wal-Mart in the after Christmas clearance aisle.
It was one of those things from the "I-have-no-idea-what-to-give-my-dad-without-spending-any-significant-money" bin. And at 75% off, if was quite affordable. I wish I'd bought a dozen of them now instead of spending all that other guilt money.

You know what guilt money is, right? It's when you spend a lot on stuff for a kid who has a birthday a few weeks post Christmas - trying to convince them that you just didn't hold back some of their Christmas gifts to save a little dough... The upside of that is you can buy stuff on clearance!

Well - I'm sure there's more to say... but I'm up against the "me first" clock now and have to hit the publish button.

Hang around... You never know what depths I'll sink to...

Thursday, April 16, 2009

A Brighter Dead

I'm still looking for those "before" shots of the bedroom - lesson learnt! I'm doing better with taking my "before" photos now.

Here's a little tip for an inexpensive spruce up that can make a dramatic difference in a dried floral arrangement.

This wreath is one of those "off the rack" jobs from Michael's. My husband bought it for me as a Mother's Day gift years ago (after I poked a 40% off coupon into his hand and shoved him down the dried floral aisle with a kid I'd spent a great deal of time whispering to...)
Way back when I received it, it was a bit brighter - but how bright can dead flowers really be after 9 or 10 years? You can dust them (sort of) and pull the cobwebs out, but they still deteriorate over time and in some cases you're just left with flower dust. There is most definitely a lifespan on this sort of decorative item and lets face it - these things are really pretty 90's... but if you need something to hold a place on the wall until you can get something else, there are cheap "fix up's" you can try. (Also note: this really isn't the right size or shape item for this space above my headboard - it's too close to the headboard AND the ceiling - but again... holding a spot until I can get just the right piece to hang here.

To punch it up, for the time being, I've brightened the color by just adding some more dried (AKA dead) flowers that I preserved (hung upside down until they were good and dead) at home. These are just inexpensive spray roses that I bought at Costco. I was able to enjoy them in a vase for a week or so and then just rubber-banded the stems together and hung them up to dry. I clipped the stems to about 5 inches and randomly (in a balanced way) poked them in here and there, adding two colors that were in my bedroom already (the bright rosy pink and the yellow.)
I changed the bow too, just from some old ribbon I had in my stash. I didn't have a good wired ribbon of the right color - when I find something that works better I will likely change it again.

It doesn't drag us out of the 90's, but it puts a smile on my face for now. I love a cheap fix up!

Wednesday, April 15, 2009

Friday, April 10, 2009

Curb Appeal

After almost four and a half years in this house, we've finally decided to do something about the way we look to passers by...

This past summer we had the house painted.

This is what it looked like last Easter...

And this is what it looked like three days ago...

And this is what it looks like now...
Now, somewhere around here I have photos of what the master bedroom used to look like. Not with all the boxes and junk... just what it was arranged like. As soon as I find those I'll post the "after" photos of that room for you. It's a very dramatic change.

ETA: A couple of you have been concerned about the "deer" factor. Yes... we get deer in our front yard (and back yard) all the time - even though we're in the middle of town. But I was actually smart about this (for a change) and got some plants that deer are said to not like to snack on. Also - My mom tells me that if you put slivers of Irish Spring soap in amongst your plants the deer won't bother them. They must be afraid of the potential whistling...

Wednesday, April 8, 2009

How to Blow Easter (eggs)

To continue the easy Easter decorating theme for this week I'll show you what I did with some plain and not so plain ol' chicken eggs.

I have a very stylin' friend that just happens to also have a small farm. And on this farm she has some chickens... and these chickens lay beautifully colored eggs. She tells me this is because a chicken lays eggs the same color as its' ears... I'm not sure whether or not to believe this, as I don't recall seeing a chicken's ears before... And I've been around my share of chickens - but that's a story for another day...

Anywho - If you want to display "real" eggs, you have to empty them out first - otherwise you risk Templeton the Rat coming for a visit.


Go ahead and assemble all the "tools" you'll need...
  • Paint - I used Making Memories Meadow & Celery (green), Eggplant & Lilac (purple), and Sunflower & Banana (yellow).
  • Foam Brushes
  • A Paper Plate (or something to use to hold your paint)
  • 12" Bamboo Skewers (1 for each egg)
  • Floral Foam (1 block)
  • Embroidery Needle or Straight Pin
  • Fine Glitter - I used Martha Stewart that was on clearance after Christmas at Wal-Mart. Don't hate me... I don't buy much of her stuff.
  • Glitter Glue with a fine tip applicator (it came with the glitter...)
  • Craft Mess Tray (that pink thing - it might be called a bead tray...)
  • Dryer Sheets (wipe your tray before you glitter - cleaning up the glitter will be much easier!)
  • Q-Tips and Toothpicks (for painting the designs on your eggs)
  • Raw Eggs (and something to store the contents in)
  • 1/8 inch ribbon in your three main colors (not shown)
Stick to no more than 3 paint colors if you want a "decorator" look - I used a coordinating shade and tint each of purple, yellow and green. The sponge brushes work nicely, especially if you want to thin your paint - they're perfect for spreading your glue too even if you want to coat the entire egg with glitter.

First decide how you're going to use your eggs.


When I know I'm going to have the eggs displayed in a basket or something like a vase, jar, etc, I don't put the holes on the ends of the eggs, but rather put both holes on one side like you see here.

Then you can hide the holes with the placement of the eggs.
These same eggs are above - just turned over.


But since we're going to hang these painted eggs, the holes need to be as close to the center of each end as possible. It's not rocket surgery - just eyeball it.


I like to poke my holes with a sturdy needle - like the thick embroidery kind. Start with one tiny hole and slowly expand out from there until it's big enough for the contents to pass through fairly easily. At the same time, don't make the hole so big that it's impossible to tie a little knot in the ribbon and not have it slip through.


Break the yolk with your needle or a thin wire and then start blowing.


They say one of those snot suckers (like you use to clean out a baby's congested nose) is good for blowing out the egg so you don't get dizzy... but I never get dizzy anymore. I just use a nine-year-old.

Save the insides for cooking or baking. If you store them two eggs at a time in a sealed container you can easily use them in recipes - but don't wait too long - once the shell is broken you need to use them within two days. There's more than you ever wanted to know about egg safety here.

Maybe you should just serve scrambled eggs for dinner and be done with it.

After they're all blown out, you need to rinse them the best you can. Just fill them a little with water, cover your holes with your finger and thumb, shake it up and blow the water out.


Gently feed the skewers through the eggs and put them in the foam block to dry completely and wait for you to get your paint ready.


Paint a thin even coat on your eggs and let it dry thoroughly on the skewers.

Do some decorative designs like stripes and polka-dots. I use the end of a Q-Tip dipped in paint for nearly perfect polka-dots.

After your accent paint is dry, use the fine tipped applicator to apply a little glitter glue. It doesn't take much.


Quickly sprinkle the glitter over all the wet glue. Be generous - just be sure you have something to catch the excess glitter so you can return it to the container and use it again.


A plastic bead tray works great. If you give it a wipe with a dryer sheet before, the glitter won't cling to the plastic as bad and should slide out the little hole on the end and back in to your container.

Gently tap the egg with your fingernail to knock off the extra glitter and place the skewered egg back in the foam to dry.


When the glitter is completely dry, pick a coordinating ribbon and run it through the egg. You might need to poke a toothpick through the tip of the ribbon to help you.


Tie a big knot (I use a surgeons knot - it holds well). If your holes are big, it might take more than one knot on top of the other. A decorative bead bigger than the hole would work to keep the ribbon from pulling through too.


They look nice when they hang with the small end down. Of course, this will look ridiculous if you've written any words on your egg with the small end up...


Here are some of the eggs that didn't make the hanging cut.


And the finished project again.

Sunday, April 5, 2009

Southern Comfort

This week I want to share just a few ideas for Easter and spring meal presentation, recipes, and crafts. I'm not really an "original" person - very often my inspiration comes from elsewhere like a dear friend's home, a store or boutique display or website. I especially like to take ideas I see and give them my own twist or combine them with other ideas to make them my own. So please... no gushing. That's not why I post this stuff. I post it to hopefully inspire you. And no feeling inadequate either! If you don't have matching china (or a collection of unmatched china) decorate a paper plate or cut some shapes out of paper or fabric. If you add love to whatever you're doing it will be beautiful no matter what.

For the first time in a long time (maybe even ever...) I'm ahead of the game a little bit.

On Sunday I hosted my first annual Steel Magnolia’s party - a pre-Easter luncheon and screening of the modern classic, Steel Magnolias, for a few of my friends. Because I chose to show a movie, the space I had available was very limited - there's something slightly rude about inviting someone to your home for lunch and then to sit on the floor for a couple of hours watching a crybaby movie. I love my house - but there is one thing (OK... two things... well... maybe three...) that I don't like about it – when you first come in the door it’s pretty clear that my living room is just too small for entertaining. The rest of it I’ll get into another time.


I was hoping to have a southern ladies feel but with a relaxed atmosphere too. I served a simple lunch - we started with spring greens and salad toppings - homemade ranch and my favorite bottled vidalia onion salad dressing served from white creamers.


For the main course, we had fried chicken (with 11 secret herbs and spices... that's really the only way for a vegetarian cook to make fried chicken for her friends...) biscuits with honey butter, loaded mashed potatoes, deviled eggs, and roasted asparagus with butter vinaigrette (thanks mom - it was delish! Who knew asparagus could be so good?) All washed down with either ice water, sparkling cider or sweet tea - the "house wine of the south"...


Dessert was homemade lemon bars with blue berries and strawberries and Red Velvet Cake (really Duncan Hines Devil's Food mix made with 1 cup sour cream, 1/2 cup water, 1/4 cup oil, a 1 ounce bottle of red food coloring, 3 eggs and 1 teaspoon vanilla. Mix on low for 1-2 minutes, scrape the sides and mix another 2-3 minutes. Bake according to directions on box in prepared pans. Moist and YUMMY - and I'd don't particularly care for cake...) More on the presentation later... let's just say, it tasted better than it looked.


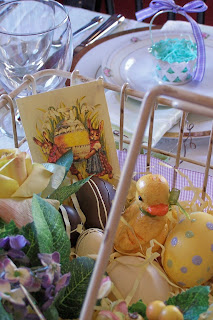
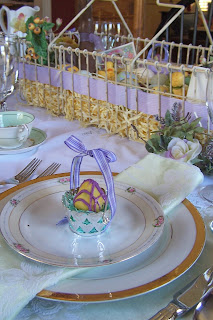
When it comes down to it, I really enjoy looking at a beautiful table, and if it's easy to put together then that's the icing on the cake. Because my tablecloth and napkins were already ironed, the only table prep I really had to do was the centerpiece and that was fairly simple. I found a basket I like, filled it with paper shred and started filling it with Easter decorations I've been collecting. I chose to use purples and yellows with a touch of green for my color scheme. I pulled mismatched salad/dessert plates and cups and saucers from my tea collection in the yellows, purples and greens and just used my plain white china dinner plates. I also used mismatched white pitchers and creamers for serving the beverages, salad dressings and sauce.


Over the table I wrapped a couple of garlands I used in one of the last weddings I decorated and I strung some blown out eggs that I painted and glittered (another use for scrapbooking supplies) on some narrow ribbon. It’s a pretty easy project and I’ll share instructions and tips later this week.

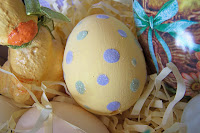
I ended up with too many painted eggs to hang and put some of them in the basket centerpiece. There are some eggs that aren't painted too. I'll have to show them to you up close in another post - they're amazingly beautiful colors, pinks, light blues and greens, and they come right out of the chicken that way! I got those from my friend Lisa's chickens. She's a great friend to have, I tell ya'!
Another simple project was just printing some vintage looking Easter pictures from my Hallmark card program, and then accenting them with some colored glitters. If you do this, the only thing you have to worry about is getting the printer ink too wet so that it would run. Use the super fine glitters and a fine tipped applicator. Just do one color at a time – and if you’re doing multiple pictures – do all of a color at once… all the yellow, then all the pink, then blue, etc.
And lest you think me totally `round the bend... those "chocolate" eggs and that "chocolate bunny" are plastic. Do you really think chocolate could survive out in the open like that around here??? And isn't nice how chocolate goes with any color scheme?


For one of the party favors, I filled some cellophane cones (the kind you make the hot cocoa cones out of at Christmas time…) with orange jelly beans and tied them with green raffia (also left over from Christmas.) You don’t have to fill them really very much – just enough to look like a carrot!


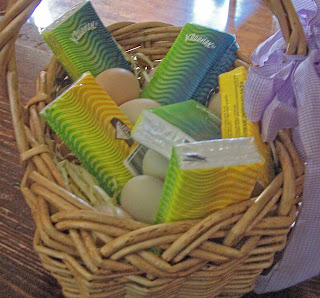
A second favor was a basket of pocket packs of Kleenexes for weepy movie watchers.

One fun touch was the Oreo Egg Truffles in the little baskets at each place setting. The baskets I’ve used for Easter before (they’re actually wedding favors that cost about $1 each). The Oreo Truffle recipe I got from my friend Cricket years ago – I just decided to make them egg shaped this time and dip them in colored candy melts to match my color scheme.

The recipe is way too simple – Take a package of Oreos, remove 9 and either crush them to use as garnish or eat them. It’s totally up to you.

Pulverize the remaining Oreos (I use my mini Cuisinart food processor) and mix them into an 8-ounce bar of softened cream cheese. I used the fat free cream cheese and didn’t get any complaints.

Roll the mixture in to 1 inch balls (or in this case eggs) and dip into either melted chocolate or candy melts. If you go with the chocolate, you can sprinkle some of those crushed Oreos on top (unless, of course, you ate them…) I took a contrasting color of the candy melts and (after melting them…) put them in a Ziploc bag, snipped the corner off and drizzled it over my dipped eggs.

Let your truffles chill on a wax paper covered cookie sheet for an hour in the fridge to firm up the cream cheese again.

One FLOP that I had was my Bleedin’ Armadilla Red Velvet Cupcakes. It was a nice thought… but cream cheese frosting just won’t do it. At least not the soft warm stuff I was trying to use. I’ll have to work on this one. I used Wilton pan with half egg shapes to make the armadillo bodies, and those little foil wrapped chocolate eggs for the heads. You know… the line in the movie is “I can’t even begin to think of how to make gray icing!” Well – it’s pretty easy – You just buy black food color! Seems there are a lot of Bleedin’ Armadilla cakes around now than there were 20 years ago when the movie came out.

I’m excited to continue this tradition next year. When my guests first arrived, I gave them a little 60 question quiz on the movie – if you’d like to try it, shoot me an e-mail and I’ll send it your way :0) They did pretty well, over all. It will be tough coming up with new questions next time. My friend Heather won the prize (that I haven’t given her yet…) with 47 correct.


I watch this movie every year at Easter and I've lost count long ago of how many times I've seen it. I could be a line coach for sure.


But it seems there's a little bit of Southern Bell in all of us. This time it was especially fun for me to watch one of my favorite movies and hear a room full of favorite friends quote the best lines along with me and use words like "honey" "precious" and "darlin'" all afternoon.


Maybe by next year I can have my expansion done on my living room so I have room for MORE friends to join me. Start studyin' now, darlin', just in case...

I'm linking to Tablescape Thursday at Between Naps on the Porch. You'll be overwhelmed with inspiration there!


Friday, April 3, 2009

Straight and Narrow

Ever been tempted to take a little hiatus from your exercise routine? Well, here’s an unsettling fact that may help you stick with it -- even if you go with an abridged version. Light exercisers who quit cold turkey for a bit -- rather than just scaling back -- have a much harder time dropping the weight they gain during the break. Something is better than nothing. Lighten up on exercise and you may gain a bit. But do nothing, or close to it, and things get much worse. When exercisers in a recent study slacked off, they gained exponentially more weight the closer they got to zero exercise. And here’s the kicker: The research also suggested that a prolonged hiatus produces weight gain that can’t be reversed by simply going back to your old routine. You have to do more. Yikes. So even if it feels strange to do less -- like walking 1 mile instead of 3 or 4 -- remind yourself that it's infinitely better than doing nothing.

I gleaned this information from a recent Prevention magazine. After I stopped sobbing I decided to get back to the gym.

You see - about a year ago I started a little break in my normal exercise routine - I decided to do a home workout that I knew worked well (see http://www.t-tapp.com/) for about 2 months. I bought all my DVDs (updating from my old VHS tapes) and was raring to go - even got a bunch of friends to come along with me on the quest. I gotta tell ya', most of them did really great - we had photos and everything and you can REALLY see a difference in where they started and where they ended up. We're talking inch loss in the area of 20 or more!

And now you're ready for the glowing report, right?

Sorry. Ain't got one.

In the last year I've gained (back) about 15 pounds. There's one minor detail to the "at home" workout that I seemingly overlooked.

You actually have to DO the workout for it to be effective.

I never really hit a good routine for getting it done. I was able to get up and get my stylish exercise ensem on, but that was about it. There was always something else to do that would only interrupt me "for a minute" and before I knew it, the day was gone and I was into the "I-can't-exercise-now-because-I'll-get-all-revved-up-and-it's-time-to-go-to-bed" zone.

I have found that for me personally, it's better to pay the $30 a month for a gym membership and go there and work out.

That's great - I'll just go back to the gym and get back on the fat girl wagon. Well, let me tell you boys and girls... That little tidbit from Prevention magazine is right on the money! It IS exponentially more difficult to lose the weight you gain during a "break".

No matter how many times a week I'd hit the gym, no matter how many minutes (usually 30-45) I'd spend on the elliptical, the weight wouldn't budge. This can truly cause that depression that only dessert can "cure". (and cause, and cure, and cause, and cure, and cause...)

So here I sit on my ample backside, needing new direction. I've gotten rid of my "fat clothes" and refuse to go back - so it seems forward is the only direction still available. It's time to shake things up and shock the system. The ole' bod has gotten used to business as usual and is holding onto the fat it its grown so fond of. Gotta throw myself a curve ball.

I think the answer is to approach this weight loss goal with the same enthusiasm that I had a year and a half ago when I began the quest to lose the first 50 (now turned 35... sniff, sniff).

  • Limit the desserts and sweets to only a treat once a week
  • Daily exercise
  • Workout with weights and machines 3 times a week
  • Start measuring portions again
and the most important...

  • Keep a food diary. (YUCK!!)

I know, I know... I HATE food diaries - but the honesty one is forced to have with one's self is harrowing. If knowing there is an off chance that someone will pick up your food diary and see that you ate

  • four portions of custard for breakfast
and
  • six truffles for lunch
with
  • a (big) piece of pizza and a sensible salad with no dressing for dinner

there's a good chance you won't eat it to begin with!

I'm headed back to http://www.sparkpeople.com/ It's free, and the tools there are easy to use. You just click on your portions and food choices, same for the exercise - when you can see what the input is and also see what your output is in calories burned, you can easily see where your issues are...

I'm just sayin'...

So, who's with me?

Thursday, April 2, 2009

Baby Girl For Sale

This is a WAAAaaaaaay back Throwback Thursday - clear back to the spring of 2004.
I've been asked to repeat this story several times, and thankfully I'd filed it away. Now those of you that didn't have the privilege of knowing my Miss Mack when she was a toddler can enjoy a laugh at my expense as well.

You can't make this stuff up...
And now, Michaela at 20 months.


Friday I got up early and showered with baby girl. Nice and clean, dressed cute.... should take her out and show her off!

I got back from taking Zachary to school and was a little ahead of schedule... so I thought I'd go shopping to a neat kids store that has great clothes and gadgets...

I called Mother in-law to see if she wanted to go along... sure.... she needs an hour to be ready.... "but we're ready NOW, do you think 1/2 hour would work for you?" I say. "Yes.... half hour will be fine" she says. She'll be waiting for us.

Great. 20 minutes after 9..., 10 minutes to be at Mother in-law's house... time to load the car....
but wait... Michaela, sweet cherub that she is, is playing in the potty! (Mother in-law broke the potty lock off last week and one of the gadgets we'll be purchasing is a new potty lock... just a reminder.)

So... change Michaela, wash her down.... new clothes for her.... better get a clean diaper. Wait right here baby.

I return with dry didie in hand to Jacob hollering..."Michaela pooped on the floor and she's playing in it!"

Not to worry, it's not ALL on the floor... most of it is in her jacket... the inside mesh part. The only poop on the floor is the poop that she tracked off the bottom of her feet.

Scoop up baby and put in bathtub (which was freshly cleaned earlier in the morning, nice and shiny, but now with brown streaks...) Trickle water so she'll stay put, but the little darling won't drown herself... Start poop scooping on living room carpet that was professionally cleaned two and a half months ago. Put jacket over edge of potty, (still unlocked..., no matter...she'd be cleaner if she managed to get in it at this point...)

Finish washing baby, (again.... seems that her skin is getting pink...must be the COMET I'm using to clean her up!)

Clean clothes for her, another cute outfit, but not quite the same.

Tackle cleaning that jacket, contemplate just wadding it up and throwing it away... but the frugal me (very small part) decides to give cleaning it up a shot. Get most of poopey out of jacket and into potty... take to washer to wash it ALONE and then make mental note to bleach washer out later...

Now....where's baby?..... We can go now....

Oh! Here's baby! Seems the precious sweetie was thirsty and got a juice box, older brother likely helped to procure said juice box. (note to self: see if baby can actually open the fridge lock and drawer in fridge all by herself... if so, this is not a good thing...)

Not all of the juice has made it IN to the baby... most is soaking into the table cloth and baby's formerly dry outfit. But some of it is on paperwork and toys left on the table. Begin the task of washing toys and discarding the less important papers now sticky with apple juice.

Change baby yet again..... wipe off sticky juice with dry parts of previous outfit.... skip the tub this time. Find an outfit that isn't covered with food stains.... better check the dirty clothes hamper for something that doesn't stink...

Collect table cloth for next load of laundry.... clean sticky juice off of table, note that my shoes are sticking to the floor now.

Grab wet paper towels to clean floor... finally done.... turn to see baby grabbing my portable 1 quart drink and dumping down the front of herself and onto the floor in the part of the kitchen I hadn't cleaned yet....

Stop screaming, for fear of neighbors calling police..... Start wiping floor with baby pointing out the spots I've missed "he-uh momma..., he-uh momma..., he-uh momma...".

Grab baby and take her to the van immediately (being careful not to get myself wet on her soaked outfit...) and strap into her car seat, which she has yet to figure out how to open...at least not the bottom part...

Go back to kitchen and give one last swiping to kitchen floor... mopping myself out the door on the way to the van.

Realize that I've forgotten my quart sized drink and go back to kitchen for it.

Retrieve drink and head for van again, slipping on wet floor and nearly killing myself, BUT not falling! I was able to "catch" myself with my leg and back muscles... (mental note, take a Soma before going to bed tonight...)

Call Mother in-law from car phone to tell her we're on our way.... it is now 11:30!

Baby is asleep, poor tired dear, before we reach Nana's house. "What a sweet baby granddaughter" she coos...

!#$%&*#%!@

It was a productive trip. I managed to buy the little honey a new dress for Spring and her 2nd birthday.... that is - if she makes it until then....

Also ordered her twin size bedding to match her big girl bedroom.... that's REALLY being optimistic wouldn't you say?

I'll send out a photo of my precious in her new dress when they're developed. (See photo above - that's the dress.)

On the way home we stopped for ice cream at a great orange grove stand. Got the little princess a scoop of chocolate..... I know, I know.... I brought it upon myself.... But at least I have a full load of laundry to do now, from TODAY alone!!!
Here's what the boys looked like back then - Jacob is barely 4 and Zachary is a few months from 7. Six months later we endured "the hurricane" that blew us to Texas.

Wednesday, April 1, 2009

For What Ails Ya


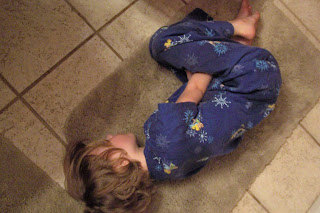
Last night this was how I found Michaela. She had been whining most of the day and 'crying wolf' about needing ginger ale because she was going to be sick just like the boys. Finally, early in the evening she started hanging around the toilet bowl a little more - but never got sick. Instead I come back a few minutes later and find her asleep.

While she slept, I made something that always makes me feel better.

Gramma Minnie's Microwave Custard

My Gramma taught me how to make this in 1978 (I think...) My parents had gone on a trip that my dad earned at work to Cancun, Mexico. My sister and I stayed in Bayou La Batre, Alabama with Gramma and Grandee. I was about 10 years old and felt so grown up to be cooking on my own. I believe I made custard every day we were there and I believe I gained about 10 pounds because of it.

It's easy enough that a 10 year old could do it... and one of my favorite comfort foods. Maybe not the best choice on a weakened stomach - but after the soda crackers and bananas stay down you can give it a shot.

To make 8 servings you'll need:

2 1/2 Cups Milk (heat 5 minutes at full power)
4 Beaten Eggs (I used fresh eggs from my friend that I stuck a needle in and blew the insides out in preparation for Easter decorating... I like to put the holes on one side so I can easily hide them.)

To the beaten eggs, add:

3/4 Cup Sugar (I used Splenda for baking - you use half of what your recipe calls for.)
1 Pinch Salt
1 teaspoon Vanilla (Mexican vanilla has a great rich flavor. It shines nicely in a recipe with so few ingredients.)

(Short commercial break for my husband... This last week he installed some under-cabinet halogen lights over my work spaces. I LOVE the difference. I no longer have to cook in a dungeon! Thanks honey ;0)

And now back to our recipe...

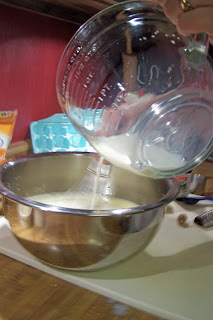
Slowly add the hot milk to the egg mixture with a whisk. If you dump it all in at once you can start the cooking of the eggs prematurely...


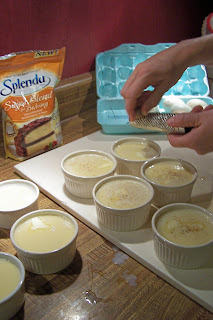
Pour into 8 half cup ramekins.


Dot the top with butter (or margarine). Use about half of what I show here.


Then sprinkle with a little nutmeg. I prefer planing a little bit of the fresh - the flavor difference is noticeable and you can usually buy the nutmeg nuts in a good market spice section (and I don't mean Wal-Mart when I say "good"...)

Put four of the ramekins in the microwave at a time and cook for about 4 to 5 minutes. The custards will be bubbling when you take them out.

Store them in the fridge. I like to hit them with the microwave for about 15-20 seconds before I enjoy one. The butter layer on the top gets cold and is yucky when it's cold... Be sure not to put too much butter on the top - my photo shows too much, but it's hard when you're taking your own picture... and the butter got a little soft under my new rockin' lights.


So what happened to Michaela? I let her sleep there for an hour or so before she started whimpering and I got her up and put her in the warm shower with her stainless steel bowl. I asked daddy to bring her a glass of cold water and when he asked why I told him I just wanted to get this party started so that I had a shot at a little sleep that night. Sure 'nuff, it worked and she was on a bed of couch cushions on my bedroom floor about ten minutes later.

I'm happy to report that everyone is back to normal again - whatever that means... and sadly, we're already out of custard.
Related Posts Plugin for WordPress, Blogger...