Friday, December 11, 2015

6 Tips for Finishing Your Christmas Shopping & Wrapping Before December 1st

This post contains affiliate links.

It's two weeks before Christmas. Are you sitting by the fire, sipping cocoa and nibbling cookies while Eartha Kitt lilts through the air? Or are you still making lists and dreading the all night wrapping session on your bedroom floor on Christmas Eve?


I'm ready. You could call me and say "let's do Christmas gifts tonight!" and I'd say, "BRING IT! (and an appetizer.)"

Aside from the arrival of gifts ordered on Black Friday and Cyber Monday on Amazon, everything for 19 different people was wrapped and tucked under the tree before December 1st.
It's a Kraft Paper & Gingham Christmas this year

I've been asked several times how I do it. It's shocking to the people that know me to think that I can be two weeks early for the Big Show, the Dance, the Holiday to overachieve all other holidays, when I'm generally about 10 minutes late for everything else in my life. I suppose I should apply the principles I use  for Christmas wrapping to the other areas of my life. (glances to the star-topped tree and strokes chin thoughtfully).

It wasn't always this way. There was a time, not too many years ago, you would find me up all night Christmas Eve, sitting with legs splayed out on my bedroom floor, exhausted, back breaking but still bent over unwrapped gifts. But I've developed a system since then that I'm hopeful will help you be able to relax and enjoy your Christmas holiday.

1. Keep a list in your phone all year with names and ideas for gift giving. I use the Color Note app and create a "locked" list. It requires a short password to open so sneaky eyes don't see your ideas. Whenever that special person mentions something they'd like  or I think of the perfect something, I note it.

2. Buy ribbon and wrapping paper on sale as soon as it's available, sometimes right after Christmas, but more likely in the early Fall. Frequently I buy my ribbon in the springtime - this year it's a red gingham that was out for Valentine's Day. The best ribbon is at Costco or Sam's club - 50 yards of wired ribbon (the wired part is essential) for less than $8. My favorite paper comes from Hobby Lobby - "Brother Sister" brand. It's heavy and doesn't easily tear over box corners and my favorite feature is the 1-inch grid lines on the back side making it super easy to measure and cut quickly. It's usually on sale 50% off long before Thanksgiving.

3. Buy and reuse a collection of sturdy, nesting, gift boxes. I have at least four sets and a couple of them that are more than 20 years old and still in great shape. They speed your wrapping time, keep gifts a secret, and make a beautiful presentation. I've always gotten them at Sam's or Costco, but didn't see them either place this year. You can find some nesting gift boxes on Amazon here.

4. Keep your Christmas wrapping supplies, (boxes, paper, ribbon) in sturdy plastic tote boxes. I use the long rectangular type that easily hold the nested boxes and wrapping paper tubes. Store them in an accessible place so when the giving season begins you can get to wrappin'. I usually start in mid October.

5. Start wrapping as soon as you start buying. Keep your shopping list in your phone current so you don't forget what you've already purchased, but start wrapping and keep wrapping as more gifts enter the house. Maybe set a goal to wrap five gifts an evening. You could probably finish in a week at that pace.

6. Keep the process enjoyable for yourself. 
Nobody wants to sit alone in a room with the door closed while everyone else is having fun elsewhere. Put together a cute little basket with your wrapping essentials like sharp scissors, tape, (I prefer the Scotch Satin Finish Gift tape - less shiny tape spots to look at...) gift tags, pens, and ribbon. Do yourself a favor and get a heavy tape dispenser - big time saver.) Box your gifts in your nesting boxes and wrap on a sturdy table, (I LOVE my Lifetime 4 foot adjustable table for this...) while watching Christmas movies with your family. They won't know what's in the the boxes and you won't have to go it alone.

That's it!

The benefits to this process are multiple. Yes, you get to enjoy the season more and stress less, but you'll likely also spend less. When you're done, you're done. Don't be tempted as I was on an all day shopping trip with my BFF this week... now I have several things to return because I just don't need them. I was right in budget and I need to STAY there.

Merry early Christmas!

Friday, September 11, 2015

Does a Bear Blog in the Woods?

***Yawn...Stretch...***

What's it like to come off a two year sabbatical from blogging?
I guess we'll see. Maybe a little like a bear coming out of hibernation. Where's the tree to scratch my back on...? and the berries... dipped in chocolate?

A lot has happened around here in the last two years...not all of it good...some of it really pretty stress inducing... like sending my first homeschooled kid off to a boarding high school (for awhile), sitting bedside for a month then eventually losing my mom-in-law, taking on the role of caregiver of my father-in-law, dealing with some pretty serious teen rebellion, getting our firstborn done with high school and off to college...then back again six weeks later... 

www.TheOtherEndOfTheCandle.com Dorm Room Makeover
Academy Dorm Room After

www.TheOtherEndOfTheCandle.com Comfort of Commitment
54 Years of Comfort and Care

www.TheOtherEndOfTheCandle.com Mom's Celebration of Life
Mom's Celebration of Life
  But there's been some pretty exciting and joy inducing stuff too. There have been lots of church activities and opportunities for service, some major holiday and birthday celebrations with the people I love the most, a pretty significant diy kitchen remodel for a ridiculously low price, a few wallet friendly weddings and showers for friends, lots of budget conscious travel, several tasty new food concoctions, some major room makeovers on a dime, a new puppy, and even our own 25th wedding anniversary and vow renewal just this summer.

www.TheOtherEndOfTheCandle.com Rustic Vintage Backyard Wedding Reception
Rustic Vintage Backyard Wedding Reception
www.TheOtherEndOfTheCandle.com DIY Kitchen Makeover on tiny budget
My DIY Kitchen of My Dreams on a tiny budget

www.TheOtherEndOfTheCandle.com Surprise Funky Vintage Teen Bedroom Makeover
Surprise Funky Vintage Teen Bedroom Makeover

www.TheOtherEndOfTheCandle.com Burlap & Mason Jar DIY Wedding with Paper Flower Accents
Burlap and Mason Jar DIY Wedding with Paper Flower Accents

www.TheOtherEndOfTheCandle.com Wedding Cake with Paper Flowers for 125 guests for less than $100
Wedding Cake for 125 for less than $100 with Paper Flower Accents

www.TheOtherEndOfTheCandle.com 25th Anniversary Vintage Vow Renewal
25th Anniversary Backyard Vow Renewal
www.TheOtherEndOfTheCandle.com Aqua & Orage Lunch with the Author of Mama Needs A Do-Over
Mama Needs a Do-Over Luncheon with Author

I've put off returning to blogging until I had things "just right". Trying to decide whether or not to dip into my tiny savings and hire a Pro to redesign my blog, frustration over the elimination of the offline blog editor I had been using successfully, reserving a spot with another blog host, but then not knowing how to make the leap, so it was just easier to put off the re-entry. Until now. I just can't pass up a good anniversary date. And all hibernations must come to an end.

www.TheOtherEndOfTheCandle.com Black Bear siting at Cade's Cove in Tennessee
Out of hibernation looking for a back scratch.
So... if you don't expect it to be pretty and flashy maybe you won't be disappointed. My hope is that you'll find at least a few Pin-able ideas and how-to's in the near future. I'm just here to help.

Thanks, mom and my other reader, for sticking around and not deleting this bookmark. (Do people bookmark sites anymore???)  I'll try my best not to disappoint.


Sara

Wednesday, September 11, 2013

Remember Me?

Remember me? I used to blog here.Then I got distracted. That happens sometimes. Okay… it happens a lot. I wrote that first line more than a month ago.

Since my last post I took my family on a three week trip to New York City, came back and made bridal shower invitations,  threw a bridal shower, planned and executed two different, budget-friendly weddings and receptions, had five family birthdays, (three in my own house) thrown an 8th grade graduation open house, celebrated at least four major holidays and started (and stuck to!) a new diet way of eating. You’ve missed a LOT.

It’s always so difficult for someone like me, (afflicted with a touch of OCD) to just pick up blogging where I am now, especially when I feel like I’ve got such great stuff to share – stuff that I think could possibly even be beneficial to you. Especially  if you like to throw a nice soiree on a tiny budget. So I’ll try to jump back in gently and share some of my favorites.

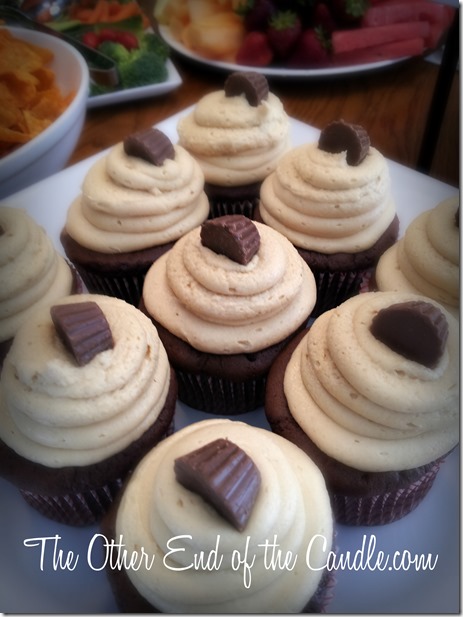
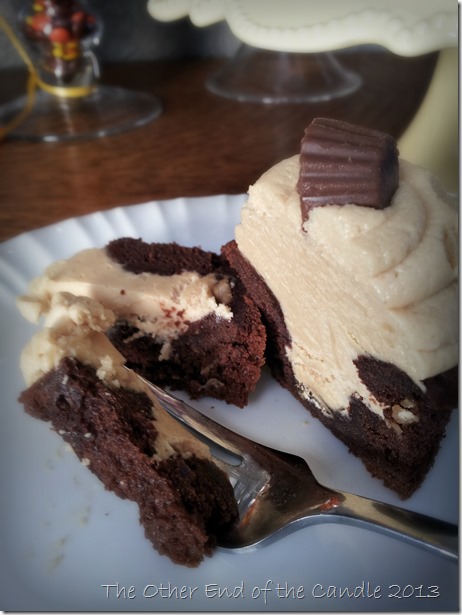
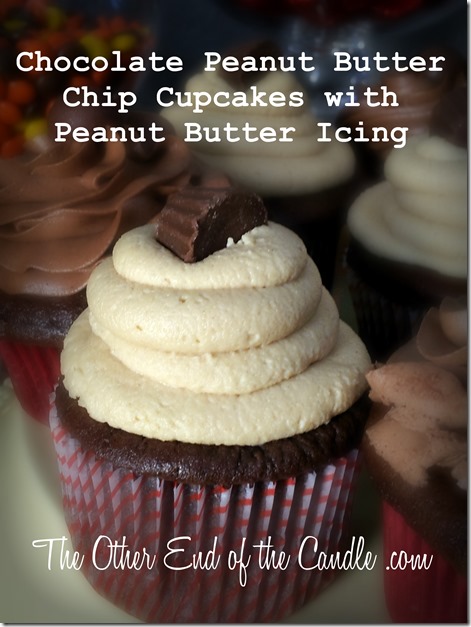
To celebrate my return, and attempt to win back your affection, I will share with you my new favorite cupcake recipe – Chocolate Peanut Butter Chip Cupcakes with Peanut Butter Frosting. Oh yeah… they’re awesome!

Chocolate Peanut Butter Cupcakes with Creamy Peanut Butter Frosting via TheOtherEndOfTheCandle.com

Just try to ignore those other chocolaty chocolate, delightfully delectable cupcakes in the photo…we’ll address those another day.

This recipe has a nice shortcut for you – it uses a box cake mix, but we’re going to dress it up so that nobody will ever guess you started with a mix.

Chocolate Peanut Butter Chip Cupcakes

  • 1 Devil’s Food Cake Mix (I prefer Duncan Hines)
  • 1 small (4 serving) Instant Chocolate Pudding Mix
  • 4 large Eggs
  • 1 C Sour Cream
  • 1/2 C Milk
  • 1/2 C Melted Butter
  • 1 C Reece's Peanut Butter Baking Chips

Heat oven to 350° F.

Beat all ingredients except for the Peanut Butter Chips at medium speed for 30 seconds and then high for 2 minutes with an electric mixer. Fold in the Peanut Butter Chips. Batter will be very stiff.

Fill a gallon size zip-top back with your cake batter, snip off a corner so you can easily fill your paper cupcake liners and squeeze to fill each liner 3/4 full. Place in center of the oven oven (1 pan at a time). Reduce heat to 325° F and bake for 20 minutes or until toothpick comes out clean.

Cool the cupcakes for about 10 minutes then cut the centers out to hold filling. You can use something like a steak knife, small and serrated, to cut out a cone shape – like you’d cut the stem out of a tomato, only deeper. OR… take the easy road! I started using the fat handle on a meat tenderizer (kitchen hammer) and just press it into the center of the warm cupcake.

I’ll admit, there’s an advantage to using the knife method…then you have all those centers you can taste test…(But the kitchen hammer takes less time).

Now, we need to fill and frost the cupcakes and this icing is sooo good! I got this recipe from the book Simply Sweet Best Cupcakes Ever! And it’s easy enough that a husband with kitchen skills can whip it up for you when you’re running late. Honest.

Be jealous ladies, be very jealous. My man has mad kitchen skills.

Chocolate Peanut Butter Chip Cupcakes with Peanut Butter Icing - Party perfect via TheOtherEndOfTheCandle.com

Peanut Butter Frosting

(makes 3 cups)

  • 1/2 C Butter, softened
  • 1 C Creamy Peanut Butter
  • 4 C Powdered Sugar
  • 1/4 – 1/2 C Whipping Cream
  1. Beat butter and peanut butter at medium speed with an electric mixer until creamy.
  2. Gradually add half of the powdered sugar, beating at low speed until blended.
  3. Add 1/4 cup whipping cream, beating until creamy. Add remaining powdered sugar, beating until blended.
  4. If necessary, add more cream, beating at high speed 2 minutes or until creamy.

I used a large disposable decorating bag and a Wilton 2A tip to fill and ice these cupcakes in one smooth, but generous, motion. (The  bags and tip can both be found at a craft store or even your local super center.)

Each cupcake is topped with a mini Reece’s Peanut Butter Cup. These are the unwrapped ones you find on the baking aisle near the chocolate chips.

Chocolate Peanut Butter Chip Cupcake with Peanut Butter Icing Filling via TheOtherEndOfTheCandle.com

These cupcakes were a big hit. You need to refrigerate any leftovers you might (inconceivably) have, but then bring them to room temp before eating them – the icing softens up nicely that way. Don’t worry, it doesn’t take too long.

Chocolate Peanut Butter Chip Cupcake with Creamy Peanut Butter Icing via TheOtherEndOfTheCandle.com

It feels good to be back after a very long break. I’m excited to share more with you again soon. We’re coming into my favorite time of the year and I just won’t be able to hold back! OCD be darned!

Wednesday, February 13, 2013

Valentine Conversations

It’s just a couple of days now, until National Chocolate Day, uh, I mean Valentine’s Day… honest mistake.

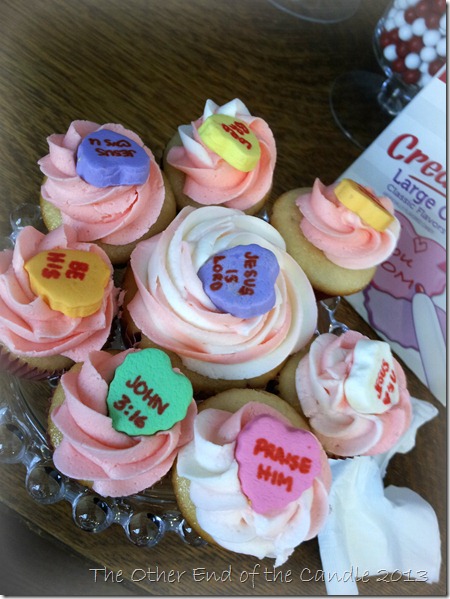
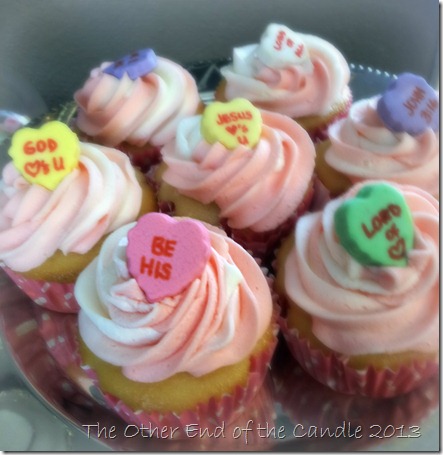
There’s still time if you need to make a treat to share. Today I wanted to feature a product I found at my local discount grocery/underwear store, (aka, Wal-Mart), Brach’s Create Your Own Conversation Hearts. Up until now, if you wanted personalized hearts you had to buy a complete run of 1.7 million candies. I think this is a better deal…  AND, they can say anything you want – you personalize them with the food-grade, red marker included. Use standard block letters in all caps and folks will think you bought them that way.

Valentine Cupcakes with Custon Conversation Hearts via TheOtherEndOfTheCandle.com

I have fond memories, as many of you probably do too, of covering shoe boxes or oatmeal canisters with construction paper,  ribbons and paper doilies to make lovely “mailboxes” for receiving those dozens of special Valentine greetings so thoughtfully chosen. One can never be too careful about sending just the right message. Cursed was the mother that picked up a box of Valentine cards with sentiments that were too icky and mushy!

Custom Conversation Hearts on Valentine Cupcakes via TheOtherEndOfTheCandle.com

Being homeschoolers, this is one of those scholastic traditions my kids miss out on… like cafeteria food, bullying and wearing clothes to school instead of pajamas. To make up for it, I make cupcakes for them to share with their class. The recipe I found online (and tweaked ever-so-slightly) would make enough for the standard classroom… I got 24 regular sized cupcakes and 36 mini ones. That’s 12 mini and 8 regular cupcakes per student in this school. I haven’t had to make lunch for 3 days.

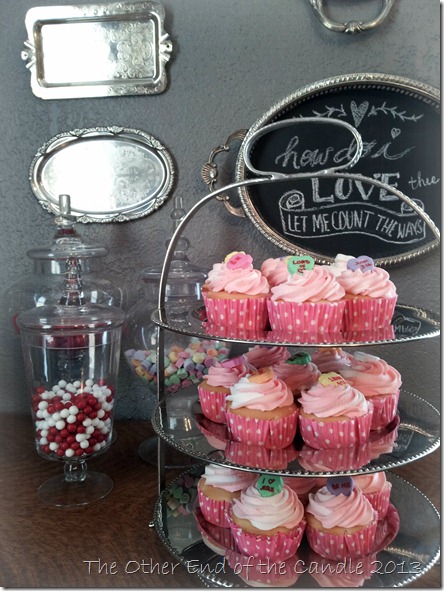
Valentine Cupcakes via TheOtherEndOfTheCandle.com

The “art” on my silver tray chalkboard is a complete and total (bad) copy of the chalkboard art of Rhonna Farrer that I saw on Facebook.

If you’re making just the regular sized cupcakes you should easily get 36-40 cupcakes. These are more dense than just a box mix and taste more “homemade”.

Valentine Cupcakes

  • 1 box Duncan Hines French Vanilla cake mix
  • 1 cup all purpose flour
  • 1 cup granulated sugar
  • 3/4 teaspoon salt

  • 3 eggs

  • 1 1/3 cups water

  • 2 Tablespoons vegetable oil

  • 1 cup sour cream

  • 1 teaspoon vanilla extract

Filling

  • 1 can Duncan Hines Comstock cherry pie filling

Mix all of the dry ingredients then add the wet ingredients. Using an electric mixer for about 30 seconds to incorporate and then for a full two minutes.

I use a gallon sized Ziploc bag with the corner clipped off to fill my cupcake papers. Squeeze in enough batter to cover the bottom of each cupcake liner then carefully set the bag aside (or have an assistant hold it for you…) Spoon one or two cherries from your cherry pie filling into the center of each cupcake. (You will have pie filling leftover.) Continue filling each cup with batter to about 3/4 full, covering the cherries, and then bake at 350° F for about 20 minutes. Cool completely.

Cutom Conversation Hearts for Valentine Cupcakes via TheOtherEndOfTheCandle.com

Two-toned pink and white Wedding Cake Frosting tops these beauties – it’s a favorite around here..I especially like it because there’s not shortening in it – just basically butter, whipping cream and sugar. I used a 1M tip to make the big swirls on top. You can find my frosting recipe and piping tips here.

Brach's Customizable Conversation Hearts for Valentine's Day via TheOtherEndOfTheCandle.com

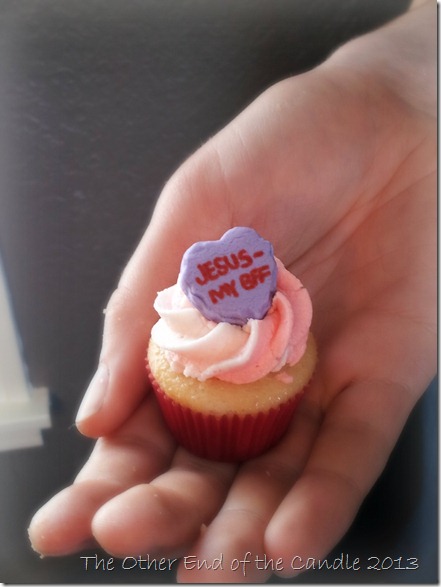
I loved being able to personalize my conversation hearts, the possibilities are endless here. The only other tip I would give is not to place the hearts on top of your cupcakes too early…they will absorb the moisture from your frosting and the ink will tend to “swell” or bleed just slightly.after a day or two.

Custom Conversations Hearts for Valentine's Day - Jesus - My BFF via TheOtherEndOfTheCandle.com

I was not compensated in any way for this product review – just found something I liked and shared my personal opinion.

Are you planning any special treats for your students on Valentine’s Day?

I’m linking up to this party at my friend, Lisa’s blog with more than 600 Valentine crafts, recipes and décor ideas and this Valentine link up at Project Inspire and also the

Hip Homeschool Hop Button

Friday, February 8, 2013

Make Your Sweetie Pucker Up

It’s upon us once again and as far as “made-up-good-for-little-just-a-sneaky-way-to-get-us-to-buy-greeting-cards” holidays go, this is probably my favorite. A holiday dedicated to LOVE (and chocolate) wins my vote every time.

For the first few years (in the 25 year plus adventure my babies’ daddy and I have been on) we tried to actually go “out” on Valentine’s Day.  We eventually got tired of the long lines at theme parks and 2 hour waits for a table at the nearest chain restaurant and started staying home on February 14th and going out another night.

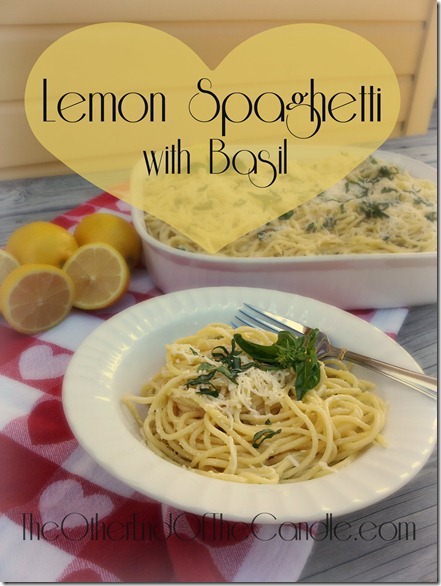
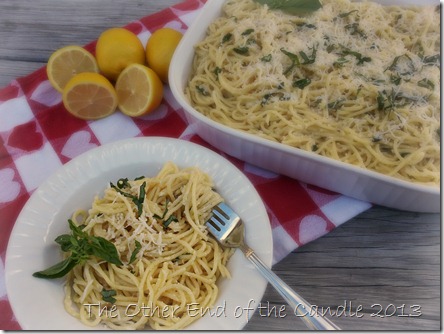
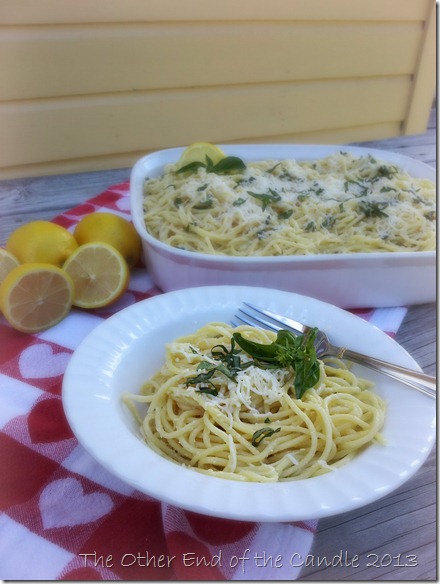
Lemon Spaghetti with Basil from TheOtherEndOfTheCandle.com

Since we had our brood we’ve tried to do a little “Love” themed dinner for the whole family on Valentine’s Day and I try to come up with something that maybe we don’t usually eat.

This is a challenge, since, 1) my family is vegetarian,  2) I don’t really have a large repertoire of things that I make, and D) I’m really not a fan of standing around in the kitchen cooking all day (and then cleaning up). So just about everything I make is fast and easy.

I took some inspiration from my aunt Margaret this summer (when she made us vegetarians a yummy Lemon Spaghetti – she really rocks in the kitchen…) and from Rachael Ray.

Lemon Spaghetti 2 via The Other End Of The Candle.com

Lemon Spaghetti

Ingredients

  • Salt
  • 2 pounds spaghetti
  • 6 tablespoons extra-virgin olive oil
  • 8 cloves garlic, pressed
  • 1/4 teaspoon ground cayenne pepper 
  • 4 lemons, zested and juiced
  • 1 1/2 cups heavy cream (or 1 1/2 cups milk & 2/3 cups melted butter)
  • 2 cups finely shredded Italian Cheese blend (Mozzarella, Provolone, Parmesan, Romano, Fontina and Asiago cheeses)
  • 1 cup (20 or 24 leaves) fresh basil, very thinly sliced
  • black pepper, freshly ground

Directions

Boil a large pot of salted water and drop in the spaghetti..

Add extra-virgin olive oil, garlic and cayenne pepper to a large skillet over medium heat.

When the pasta is about half done (about 5 minutes into cooking), add lemon juice, 2 cups of the starchy cooking water from the pasta and the cream (or milk/butter mixture) to the garlic and oil. Raise heat a bit to bring sauce to a bubble.

Cook the pasta al dente and then drain. Add lemon zest and half of the cheese to the sauce. Season with salt and black pepper, to taste. Add pasta to the sauce and turn off heat. Toss the pasta with sauce allowing it time to soak up the sauce. Mix in about 2/3 of the basil.

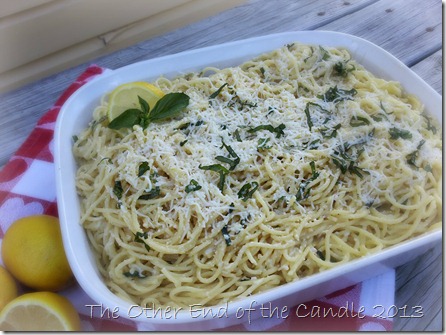
Lemon & Basil Spaghetti via TheOtherEndOfTheCandle.com

Garnish the plates of pasta or the serving dish with remaining cheese, and basil.

This is an excellent side dish or even great for an interesting addition to a potluck.

What are you making for your honey this V-day or your next “meatless Monday”?Lemon Spaghetti via The Other End Of The Candle.com

Related Posts Plugin for WordPress, Blogger...